Requirements:
OS: Debian 9 (Virtual box or VPS) with root access
Server side setup on Debian:
1) Run apt update:
apt-get update
2) Install this software if you dont have it already: git make default-libmysqlclient-dev zlib1g-dev libpcre3-dev
apt-get install git make default-libmysqlclient-dev zlib1g-dev libpcre3-dev
3) Add unstable sources list to apt (dont worry it wont break anything it is just dev version), after that run update again:
echo "deb http://ftp.us.debian.org/debian unstable main contrib non-free" >> /etc/apt/sources.list.d/unstable.list
apt-get update
4) Install GCC and G++ compilers for C/C++ (programming language in which the rAthena server software is written): (IMPORTANT USE THESE COMMANDS ONE BY ONE DO NOT COPY ALL 4 AND PASTE IT INTO TERMINAL BECAUSE U NEED TO ACCEPT THE INSTALL BEFORE EXECUTING LN COMMANDS)
Do not execute all of 4 commands at the same time, copy first command, wait until it finishes after that second and so on:
apt-get install -t unstable gcc-5

apt-get install -t unstable g++-5

ln -s /usr/bin/gcc-5 /usr/bin/gcc

ln -s /usr/bin/g++-5 /usr/bin/g++
5) Now its time to download rAthena:
cd /home
git clone https://github.com/rathena/rathena.git ~/rAthena
6) Configure it for compiling by (this command must be called in the folder where you downloaded the rAthena):
./configure
7) Now build the server (this command must be called in the folder where you downloaded the rAthena):
make server
8) Before you can run it, you must make all server executables executable:
chmod a+x login-server && chmod a+x char-server && chmod a+x map-server
MySQL Database setup (skip this if you already have MySQL, apache and phpmyadmin and continue with step 18):
9) Now its time to install MySQL database for the server, depending on which mirror you have for your debian it is recommended to reinstal bsdutils, sometimes this needs to be done in order to install MySQL but only in certain debian mirrors, but by reinstalling this you cannot make anything bad so do it anyway:
apt-get --reinstall install bsdutils
10) Set locales to en_US UTF 8 (DO THIS ONLY IF YOUR VPS OR SERVER IS FOR RO PURPOSES ONLY BECAUSE THIS MIGHT BREAK SAME NON UTF APPS RUNNING ON YOUR SERVER):
locale-gen en_US en_US.UTF-8
11) Now proceed to the installation of MySQL:
apt-get install mysql-server mysql-client
12) Its recommended to run basic MySQL setup (this script will guide you, you will just select yes/no), it will ask you tu choose password for the main db user:
mysql_secure_installation


What you want to fill in the dialogue:
- deny anonymous users YES
- delete test databases YES
- allow remote connections YES (if you want this db for web that will be running in different place)
13) OPTIONAL: Apache setup (you dont need to do this but phpmyadmin is better for manipulating with DB then just pure console:
apt-get install apache2
14) OPTIONAL Install PHP:
apt install php7.0 libapache2-mod-php7.0 php7.0-mysql php7.0-gd php7.0-opcache
15) OPTIONAL: Install phpmyadmin:
apt-get install phpmyadmin
15) OPTIONAL: Setup phpmyadmin
Go to the file /etc/apache2/apache2.conf and in the last line add a new line containing this:
Include /etc/phpmyadmin/apache.conf
Then perform apache restart:
service apache2 restart
16) After that you can go to your browser and open htttp://YOUR_IP/phpMyAdmin/ and you should see this:
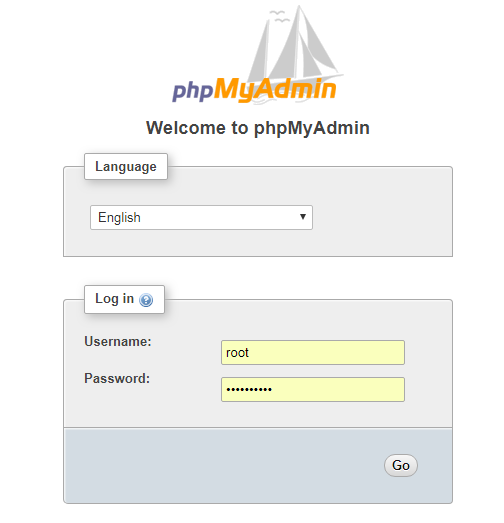
Log in with the name and the password you selected during MySQL installation
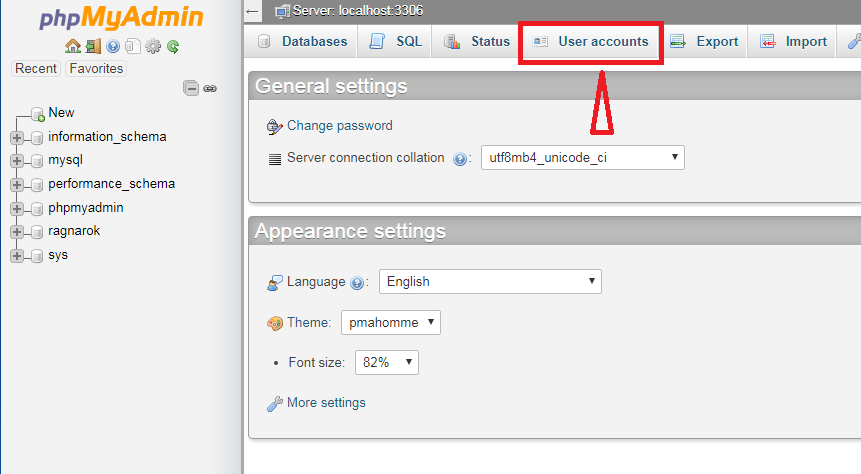
17) Now its time to create user and database for ragnarok server, click on "User accounts":
Database creation (skip this if you know how to create a new database):
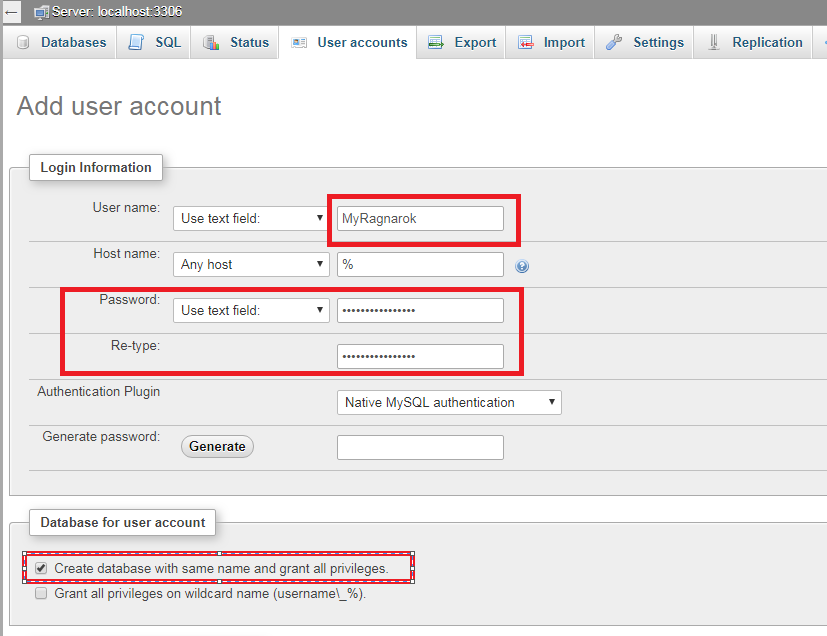
18) Add user account:

19) Fill user name and password (you can choose whatever you want, but please remember it), dont forget to check to Create database with same name and grant all privilages:
20) Now open the database you have just created (from the left menu) and click Import

21) Now go to your server files and find this file: /rAthena/sql-files/main.sql and upload it and import it.
22) Now you just need to setup the database to the rAthena, so go to the file: /rAthena/conf/inter_athena.conf, full in username and password from the user you created via phpmyadmin:
// MySQL Login server
login_server_ip: 127.0.0.1
login_server_port: 3306
login_server_id: USER_NAME
login_server_pw: PASSWORD
login_server_db: USER_NAME
login_codepage:
login_case_sensitive: no

ipban_db_ip: 127.0.0.1
ipban_db_port: 3306
login_server_id: USER_NAME
login_server_pw: PASSWORD
login_server_db: USER_NAME
ipban_codepage:

// MySQL Character server
char_server_ip: 127.0.0.1
char_server_port: 3306
login_server_id: USER_NAME
login_server_pw: PASSWORD
login_server_db: USER_NAME

// MySQL Map Server
map_server_ip: 127.0.0.1
map_server_port: 3306
login_server_id: USER_NAME
login_server_pw: PASSWORD
login_server_db: USER_NAME
23) Now we need to setup server IPs:
Go to: /rAthena/conf/
Open: char_athena.conf
server_name: YOUR_SERVER_NAME
login_ip: 127.0.0.1 //just uncomment this line and let it like 127.0.0.1
bind_ip: 0.0.0.0 //uncoment this line and set it to 0.0.0.0 (bind to all interfaces)
char_ip: XXX.XXX.XXX.XXX //set it to your WAN IP (public IP)


//Find this values and set it to no:
pincode_enabled: no
pincode_force: no
Open: map_athena.conf
char_ip: 127.0.0.1 //uncoment and let it like this
bind_ip: 0.0.0.0 //uncoment and set it to 0.0.0.0
map_ip: 192.168.0.119 //set it to your WAN IP (public IP)
Open: login_athena.conf
bind_ip: 0.0.0.0 //uncoment this and set it to 0.0.0.0
25) Now you need to setup spawn:
Open /rAthena/conf/char_athena.conf
And set start point like this:
start_point: prontera,155,182
26) Now we need to disable packet encryption:
Go to this file: /src/config/packets.h
Make it look like this to disable packet encryption (obfuscation), comment out only 4 lines which I "highlighted", do not touch anything else):
// Copyright (c) rAthena Dev Teams - Licensed under GNU GPL
// For more information, see LICENCE in the main folder
#ifndef _CONFIG_PACKETS_H_
#define _CONFIG_PACKETS_H_

/**
 * rAthena configuration file (http://rathena.org)
 * For detailed guidance on these check http://rathena.org/wiki/SRC/config/
 **/

#ifndef PACKETVER
 /// Do NOT edit this line! To set your client version, please do this instead:
 /// In Windows: Add this line in your src\custom\defines_pre.h file: #define PACKETVER YYYYMMDD
 /// In Linux: The same as above or run the following command: ./configure --enable-packetver=YYYYMMDD
        /// original value: 20151104
 #define PACKETVER 20151104
#endif

#ifndef PACKETVER_RE
 /// From this point on only kRO RE clients are supported
 #if PACKETVER > 20170614
  #define PACKETVER_RE
 #endif
#endif


#if PACKETVER >= 20110817
 /// Comment to disable the official packet obfuscation support.
 /// This requires PACKETVER 2011-08-17 or newer.
 ///#ifndef PACKET_OBFUSCATION --------------------------comment out this line
  ///#define PACKET_OBFUSCATION --------------------------comment out this line

  // Define these inside src/custom/defines_pre.h or src/custom/defines_post.h
  //#define PACKET_OBFUSCATION_KEY1 <key1>
  //#define PACKET_OBFUSCATION_KEY2 <key2>
  //#define PACKET_OBFUSCATION_KEY3 <key3>

  /// Comment this to disable warnings for missing client side encryption
  ///#define PACKET_OBFUSCATION_WARN --------------------------comment out this line
 ///#endif --------------------------comment out this line
#else
 #if defined(PACKET_OBFUSCATION)
  #error You enabled packet obfuscation for a version which is too old. Minimum supported client is 2011-08-17.
 #endif
#endif


#ifndef DUMP_UNKNOWN_PACKET
 //#define DUMP_UNKNOWN_PACKET
#endif

#ifndef DUMP_INVALID_PACKET
 //#define DUMP_INVALID_PACKET
#endif

/**
 * No settings past this point
 **/

/// Check if the specified packetversion supports the pincode system
#define PACKETVER_SUPPORTS_PINCODE PACKETVER >= 20110309

/// Check if the client needs delete_date as remaining time and not the actual delete_date (actually it was tested for clients since 2013)
#define PACKETVER_CHAR_DELETEDATE (PACKETVER > 20130000 && PACKETVER <= 20141022) || PACKETVER >= 20150513

/// Check if the specified packetvresion supports the cashshop sale system
#define PACKETVER_SUPPORTS_SALES PACKETVER >= 20131223

#endif // _CONFIG_PACKETS_H_
27) Now its time to recompile server:
make clean
make server
25) Now you can start the server (execute this command from the main server directory):
./athena-start start
Client side setup on windows:
2) Unpack it to a new clear folder
4) Unpack the NEMO wherever you want to
5) Download Ragexe client [Link 1], or any other Ragexe from https://rathena.org/board/forum/99-client-releases/ but 2016+ clients are not fully supported by NEMO so you might run into issue, better download 2015 client
6) Unpack the Ragexe into your ragnarok client folder
7) Download GRF Editor and install it whereever you want
8) Now its time to open NEMO program
- Click on browse and navigate to the Ragexe client you downloaded
- Click on LOAD CLIENT button
- In the search filed type "Disable packet Encryption" click on the red circle to make it green
- Find "Skip licence screen" and make it green
- Find "Use Ragnarok icon" and make it green
- Find "Custom Window Title" here you can write name of your RO client (whatever you want)
- Now just click "APPLY SELECTED" and it will create a new .exe file - this is the file you will run to start your client, but dont start it yet
9) Open GRF Editor
- Click on File -> Open and open data.grf (this file is in the main folder of your unpacked client)
- Now type in the serach window clientinfo.xml and open the file, now edit the <address> to the adress where your server is running.
NOTE: If the file is empy and does not contain <adress> line, try other GRF files in the main client folder
- After edditing the address click on save and override the file.
10) Now you just need to setup packtversion on the server to match your ragexe, so go to your server and write to terminal:
In this case I put there 20151029 which is the release date of the Ragexe, if you have downloaded other, put there your number of your ragexe you downloaded, these commands must be performed from the folder of your server, stop the server if you already started it:
./rAthena stop
./configure --enable-packetver=20151029
make clean
make server
11) Start the client and play!
FAQ:
Q: How do I get to certain folder in Debian so I can perform commands over it like ./configure or make ?
A: Just do "cd /myfolder/anotherfolder"
Q: How to change resolution for my client ?
A: Download opensetup (google it) and put it in the main client folder.
Q: Cannot connect to my server after login it says "Failed to connect to server"
A: Make your that your server is configured for the same version as your Ragexe is.
Q: After starting my ragnarok client it shows many errors
A: Please use Ragexe 2015 and earlier, 2016+ Ragexe versions are not fully compatible with NEMO
Q: In GRF Editor I cannot find clientinfo.xml
A: Try different .grf file (ourdata.grf, serverdata.grf or so on it might be called differently)
Q: Cannot start the client ?
A: Please check that in your main client folder you have DATA.INI file, open it and make sure that the numbers of the grf files are starting from 0, the file should look like: (the names of your GRF files may vary depending on which kRO you have downloaded), first file should be the one containing clientinfo.xml with the server IP address:
[Data]
0=ourdata.grf
1=data.grf
2=rdata.grf
Q: How can I make my account GM ?
A: Go to phpmyadmin and open table login, click edit and into the group_id collumn type 99 instead of 0 or whatever the values was.
Q: How to setup exp rates?
A: /conf/exp.conf
Q: How to setup drop rates ?
A: /conf/drops.conf
Q: How to change max lvl ?
Q: How to change max stat ?
A: Edit max_parameter: 255 in this file: conf/battle/player.conf (+ edit max parameters for all other jobs)
Q: Where to change max weight limit ?
A: Here /db/re/job_db1.txt

