Introduction
Many websites and applications require databases to store and manage large sets of information. MySQL and MariaDB are popular database management systems because of their flexibility, power, and ubiquity.
For many users, managing databases is difficult from the command line. For those who prefer to use a web interface,
phpMyAdmin is a great alternative to command driven management.
In this guide, we will cover how to install and configure phpMyAdmin on a CentOS 6.4 VPS. The procedure should be fairly similar for other versions.
Step One — Install a LAMP Stack
Before we can install phpMyAdmin, we need to install Apache, MySQL, and PHP on our server. Together, along with the underlying operating system, this is known as a LAMP stack (Linux, Apache, MySQL, PHP).
We can go ahead and install the necessary components from the default
yum repositories by typing:
- sudo yum install httpd mysql-server php php-mysql
A web server, database server, and dynamic processing language will be installed on your server and ready to use.
Step Two — Configure the LAMP Stack
Next, we need to configure the components that we have just installed.
Start the Web Server
We can start by turning on our web server. The following command will start Apache:
- sudo service httpd start
Check that the server is up and running by visiting your server's IP address in a web browser:
http://server_IP_addr
You should see the default CentOS Apache test page. If you do not want to use a browser, you can view the raw HTML of the page with
curl:curl 127.0.0.1
The first part of the results should have text that looks like this:
Output
<!DOCTYPE html PUBLIC "-//W3C//DTD XHTML 1.1//EN" "http://www.w3.org/TR/xhtml11/DTD/xhtml11.dtd">
    <head>
        <title>Apache HTTP Server Test Page powered by CentOS</title>
        <meta http-equiv="Content-Type" content="text/html; charset=UTF-8" />
        <style type="text/css">
. . .
If you can see this page, the web server is up and running.
Configure MySQL
Next, we can configure MySQL, our database. Start the service by typing:
- sudo service mysqld start
The first thing we should do is run a simple security script, which will lock down some dangerous defaults. It will also allow us to set a database password for the
root administrative user:
- sudo mysql_secure_installation
The first question should ask you to enter the current password for the MySQL database. Since we haven't configured a password yet, just hit ENTER. You can then choose and confirm a password for the database immediately. Hit ENTER through all of the remaining prompts to select the default values.
You can test that your database password was set correctly by typing:
- mysql -u root -p
You will be prompted for the database password you just issued. After typing it in, you should be dropped into a MySQL session:
-
Type
exit to return to your shell session:
- exit
Your database is ready to go now.
Step Three — Install phpMyAdmin
Now, we are ready to install the phpMyAdmin package. This software is not available in the CentOS 6 default repositories. However, it is avialable in the EPEL repos (Extra Packages for Enterprise Linux).
We can add access to the EPEL repositories to our system by typing:
- sudo yum install epel-release
After accepting the new repository, you can install the phpMyAdmin package by typing:
- sudo yum install phpmyadmin
This will install phpMyAdmin. We still must configure it though.
Step Four — Configure phpMyAdmin
For security purposes, we should lock down access to the phpMyAdmin interface to a specific IP address.
Find Your IP Address
You will need to know the IP address of the computer you plan on using to access your databases. This is a security precaution so that unauthorized people cannot connect.
Note: This is the not the IP address of your VPS, it is the IP address of your home or work computer.
You can find out how the greater web sees your IP address by visiting one of these sites in your web browser:
Compare a few different sites and make sure they all give you the same value. Write this down.
Configure Apache Files
The phpMyAdmin package installs an Apache Virtual Host file that is used to configure web access. Open the file with the following command:
- sudo nano /etc/httpd/conf.d/phpMyAdmin.conf
By default, this configuration only allows access from the same computer that is hosting the software. Because the databases, web server, and administration software are hosted on a VPS instead of your home computer, we will have to adjust these values.
This is where the IP information about your home computer comes in handy. We will change every reference to
127.0.0.1 with the IP address you found.
There should be four locations that you need to change:
/etc/httpd/conf.d/phpMyAdmin.conf
. . .
Require ip your_workstation_IP_address
. . .
Allow from your_workstation_IP_address
. . .
Require ip your_workstation_IP_address
. . .
Allow from your_workstation_IP_address
. . .
Save and close the file.
You need to restart the server with the following command:
- sudo service httpd restart
Step Five — See the Results!
Your interface should now be configured and ready to access.
Point your web browser to your VPS IP address followed by "/phpmyadmin"
http://VPS_IP_address/phpmyadmin
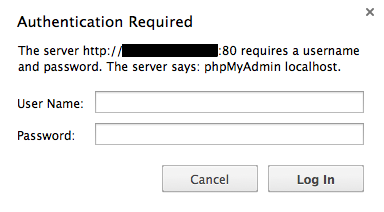
You will be asked to log in. Use the user root and the password that you selected during the MySQL configuration stage.
After you provide the requested credentials, you will have access to the phpMyAdmin interface:
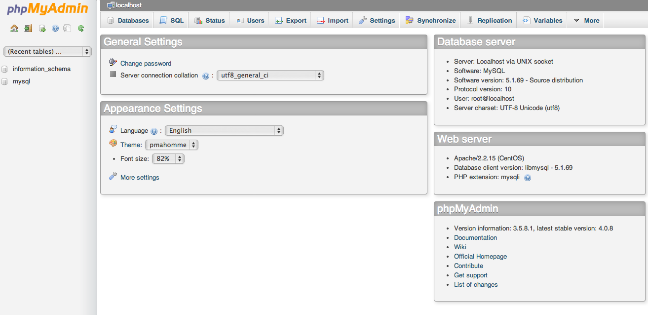
Congratulations, you can now begin managing your database software from the web interface!


